Create Enrollment Requests Manually#
The Open edX WooCommerce Plugin uses Enrollment Request to manage the enrollments generated by the WooCommerce integration, but you can create it manually.
In this section, you will learn how to create an Enrollment Request manually.
Index#
Requisites#
To connect with the Open edX platform, you must have valid settings for this plugin. If you do not have this plugin set yet, the How-to: Create an Open edX Application for the Plugin Settings will be helpful.
Create an Enrollment Request#
Enter the Enrollments Manager option in your WordPress dashboard’s Open edX Sync tab.
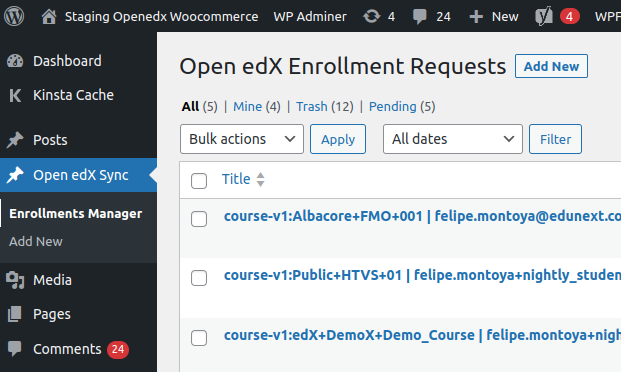
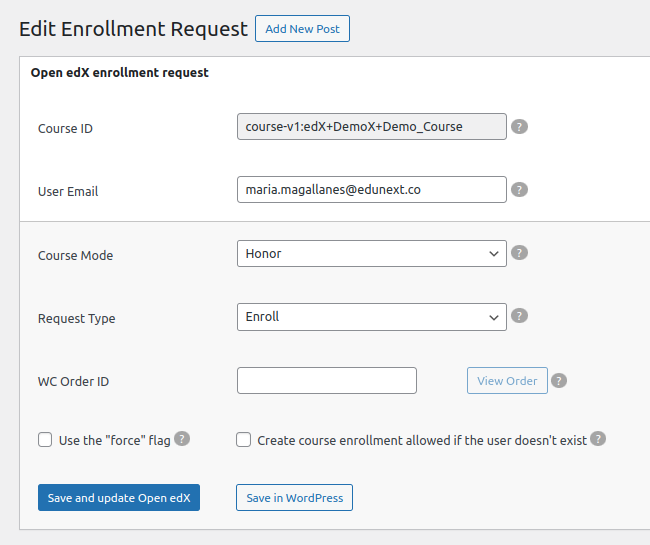
Click Add New and fill out the form with the following fields:
Course ID: the ID from your Open edX platform course. e.g.
course-v1:edX+DemoX+Demo_Course.User Email: the user’s email address that will be used in the request.
Course Mode: the mode of your enrollment request. Make sure to set a mode that your course has. We only support the modes that come by default on the Open edX platform.
Request type: If you select Enroll, you will create an enrollment, and if you choose Un-enroll, you will set a soft un-enrollment (enrollment with status inactive) if you update in Open edX.
WC Order ID (Auto-filled): You can leave this field blank. If your request was created automatically and has an order associated, this field will fill automatically.
Exploring the Enrollment Request View#
Checkboxs#
Use the “force” flag: if you select this, the action will not consider the course enrollment end dates.
Creating a course enrollment allowed if the user does not exist: if you select this, create a register in the table Course Enrollment Allowed if the email we use in the request is not a user in our Open edX platform yet. It is available only if you have a release greater or equal to Quince.